IT Onboarding Automation for Growing Australian Businesses

IT Onboarding Automation for Growing Australian Businesses
When your business hires one person every few months, manual IT onboarding is manageable. Create an account, set up a laptop, grant application access — done in a couple of hours. But when your business starts hiring regularly, those manual processes become a bottleneck. Accounts are created inconsistently, access permissions are wrong, devices are not ready on day one, and the new hire’s first impression is waiting around while IT scrambles.
This guide covers how to automate IT onboarding for Australian businesses that are growing beyond the point where manual processes scale.
The True Cost of Manual Onboarding
Before investing in automation, understand what manual onboarding actually costs.
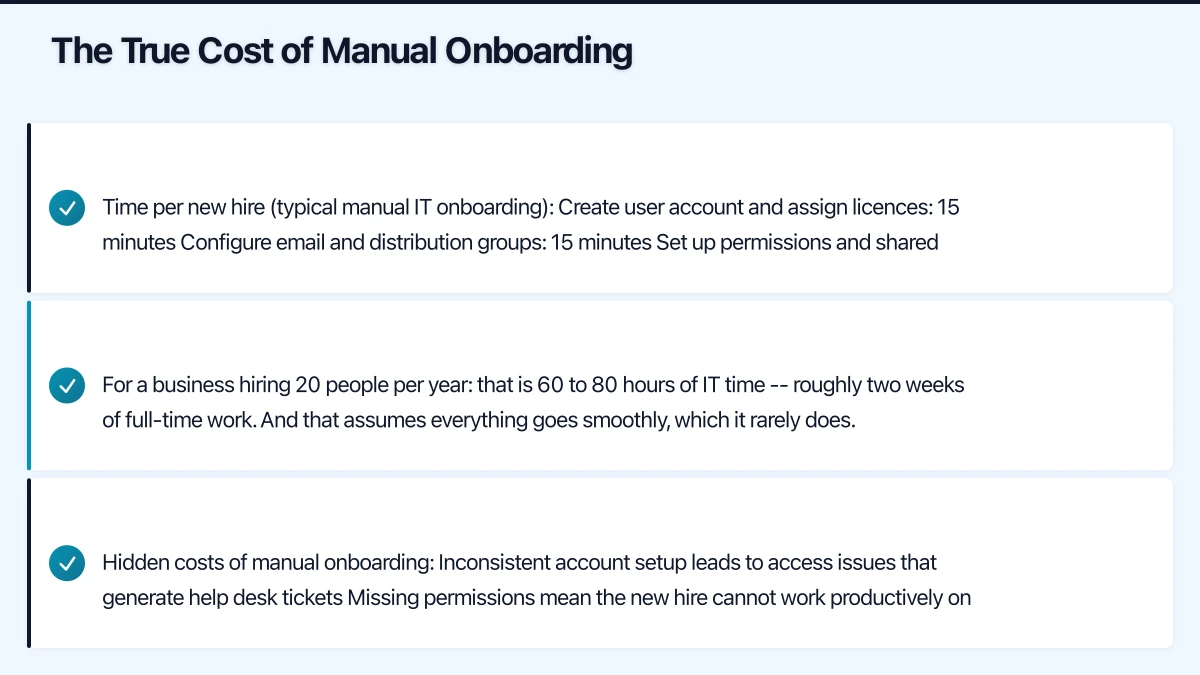
Time per new hire (typical manual IT onboarding):
- Create user account and assign licences: 15 minutes
- Configure email and distribution groups: 15 minutes
- Set up permissions and shared drives: 20 minutes
- Prepare and configure laptop: 60 to 90 minutes
- Install and configure applications: 30 to 60 minutes
- Configure phone/mobile device: 15 minutes
- Create accounts in third-party systems (CRM, accounting, project management): 20 to 30 minutes
- Total: 3 to 4 hours per new hire
For a business hiring 20 people per year, that is 60 to 80 hours of IT time — roughly two weeks of full-time work. And that assumes everything goes smoothly, which it rarely does.
Hidden costs of manual onboarding:
- Inconsistent account setup leads to access issues that generate help desk tickets
- Missing permissions mean the new hire cannot work productively on day one
- Incorrect group memberships create security risks
- IT staff spend time on repetitive tasks instead of strategic work
- The new employee’s first experience with your business is frustration
What to Automate
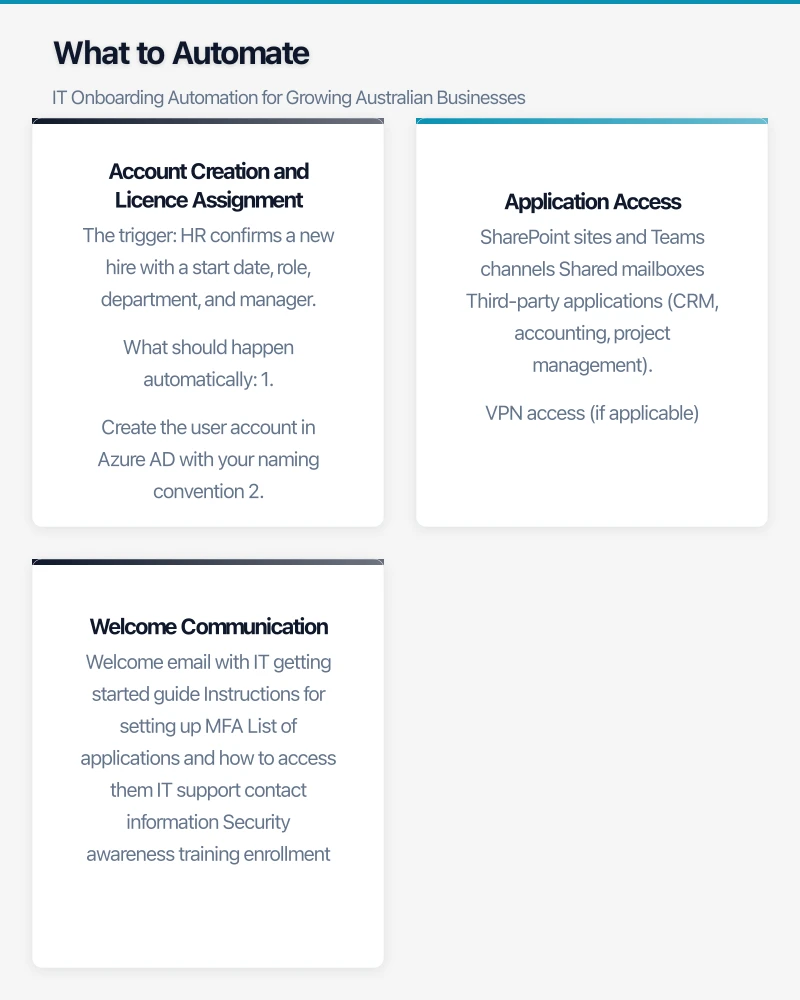
Account Creation and Licence Assignment
The trigger: HR confirms a new hire with a start date, role, department, and manager.
What should happen automatically:
- Create the user account in Azure AD with your naming convention
- Set the usage location to Australia
- Assign the appropriate Microsoft 365 licence
- Add the user to the correct security groups based on their role and department
- Add the user to the appropriate distribution lists
- Configure the email signature (using a template with the new hire’s details)
Application Access
Based on the user’s role and department, automatically grant access to:
- SharePoint sites and Teams channels
- Shared mailboxes
- Third-party applications (CRM, accounting, project management)
- VPN access (if applicable)
Device Provisioning
With Microsoft Autopilot and Intune:
- The device is pre-registered in Autopilot
- On first boot, the user signs in with their new Microsoft 365 credentials
- The device automatically joins Azure AD and enrols in Intune
- Compliance policies, configuration profiles, and applications are applied
- The user has a fully configured laptop within 30 to 60 minutes with no IT hands-on time
Welcome Communication
Automatically send the new hire:
- Welcome email with IT getting started guide
- Instructions for setting up MFA
- List of applications and how to access them
- IT support contact information
- Security awareness training enrollment
Automation Tools
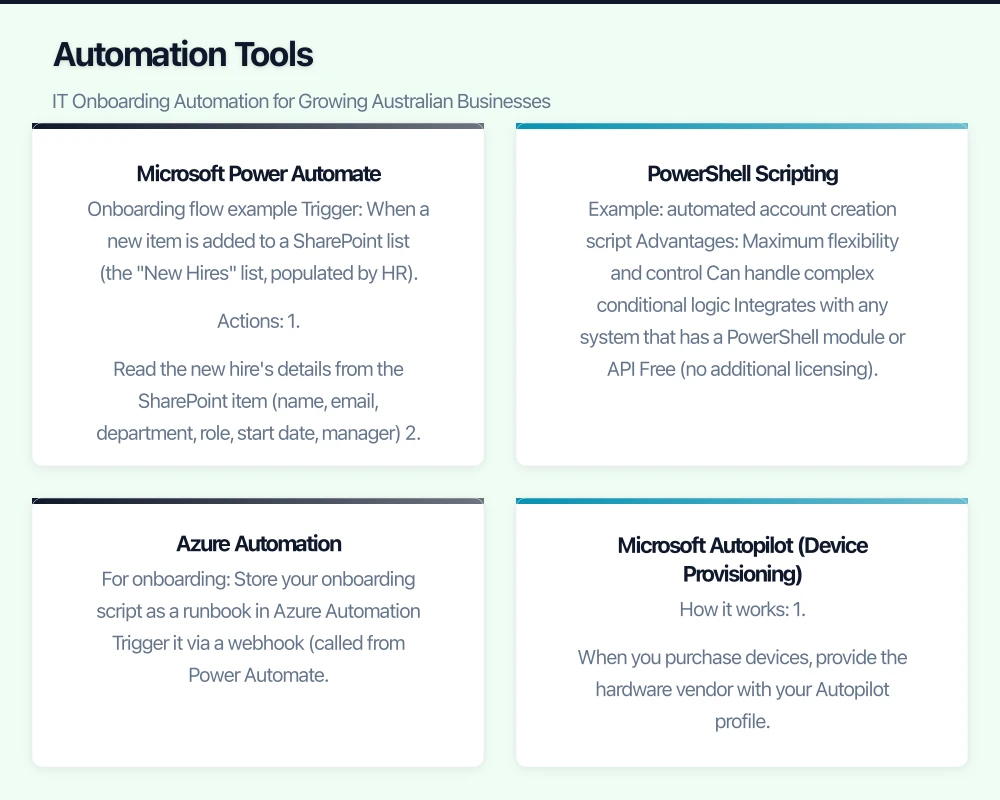
Microsoft Power Automate
Power Automate (included with Microsoft 365 Business Basic and above) is the most accessible automation tool for businesses on Microsoft 365.
Onboarding flow example:
Trigger: When a new item is added to a SharePoint list (the “New Hires” list, populated by HR).
Actions:
- Read the new hire’s details from the SharePoint item (name, email, department, role, start date, manager)
- Wait until the start date minus 3 days (prepare everything in advance)
- Create the user in Azure AD using the Microsoft Graph connector
- Assign the Microsoft 365 licence
- Add to Azure AD groups based on department
- Send a welcome email to the new hire’s personal email with first-day instructions
- Send a notification to the manager confirming IT setup is complete
- Create a Teams message in the IT channel confirming the new hire is set up
- Add a task to the IT team’s Planner board for physical device preparation
Limitations of Power Automate for onboarding:
- Creating Azure AD users requires a premium connector (Microsoft Graph)
- Some third-party application provisioning is not possible through Power Automate
- Complex conditional logic can be difficult to maintain
- Error handling requires careful design
PowerShell Scripting
For IT teams comfortable with scripting, PowerShell combined with the Microsoft Graph PowerShell SDK provides powerful automation.
Example: automated account creation script
A PowerShell script can:
- Read new hire details from a CSV file or SharePoint list
- Create the Azure AD user account
- Assign licences
- Add to groups
- Set manager relationship
- Configure mailbox settings
- Log all actions for audit
Advantages:
- Maximum flexibility and control
- Can handle complex conditional logic
- Integrates with any system that has a PowerShell module or API
- Free (no additional licensing)
Disadvantages:
- Requires scripting skills
- Needs a scheduled task or Azure Automation to run automatically
- More difficult for non-technical staff to maintain
Azure Automation
Azure Automation provides a cloud-hosted environment for running PowerShell scripts on a schedule or trigger.
For onboarding:
- Store your onboarding script as a runbook in Azure Automation
- Trigger it via a webhook (called from Power Automate or a form submission)
- The script runs in the cloud, so no on-premise server is needed
- Logging and error reporting are built in
Cost: Azure Automation provides 500 minutes of free job runtime per month, which is more than adequate for onboarding automation.
Microsoft Autopilot (Device Provisioning)
Autopilot transforms device setup from a manual, multi-hour process into a user-driven, automated experience.
How it works:
- When you purchase devices, provide the hardware vendor with your Autopilot profile. Many Australian IT resellers (Dicker Data, Synnex, Ingram Micro) can register devices in Autopilot at the time of purchase.
- Create an Autopilot deployment profile in Intune specifying your configuration preferences.
- Ship the device directly to the new hire (even to their home for remote workers).
- The user powers on the device, connects to WiFi, and signs in with their Azure AD credentials.
- Autopilot configures the device: Azure AD join, Intune enrolment, policy application, app installation.
- The user has a fully configured device without IT touching it.
Requirements:
- Windows 10/11 Pro or Enterprise
- Microsoft 365 Business Premium or above (for Intune)
- Devices registered in Autopilot
Building Your Onboarding Workflow
Step 1: Document the Current Process
Before automating, document every step of your current onboarding process. Include:
- Every account created
- Every group or permission assigned
- Every application configured
- Every communication sent
- Every physical task (device preparation, desk setup)
Step 2: Standardise Role-Based Access
Create a matrix of roles/departments and their required access:
| Access Item | Sales | Operations | Finance | Management |
|---|---|---|---|---|
| Microsoft 365 licence | Business Standard | Business Standard | Business Standard | Business Premium |
| CRM (HubSpot) | Yes | No | No | Yes |
| Accounting (Xero) | View only | No | Full access | Full access |
| SharePoint - Sales | Full | Read | No | Full |
| SharePoint - Operations | Read | Full | Read | Full |
| SharePoint - Finance | No | No | Full | Full |
| VPN access | Yes | No | No | Yes |
This matrix becomes the configuration document for your automation.
Step 3: Choose Your Automation Approach
For businesses with under 30 employees and infrequent hiring: Power Automate with a SharePoint list trigger is sufficient. It handles the most repetitive tasks (account creation, group membership, notifications) with minimal technical complexity.
For businesses with 30 to 100 employees and regular hiring: Combine Power Automate for workflow orchestration with PowerShell scripts (run in Azure Automation) for complex provisioning. Add Autopilot for device setup.
For businesses with over 100 employees: Consider a dedicated identity governance tool or HR-integrated provisioning through Azure AD lifecycle workflows.
Step 4: Build the Intake Process
The automation starts with a trigger. Common options:
SharePoint list (simplest): HR adds a new row with the hire’s details. Power Automate picks it up.
Microsoft Forms: HR fills out a form, which populates a SharePoint list and triggers the flow.
HR system integration: If you use Employment Hero, KeyPay, or another HR platform, check if it offers API integration or Zapier connectors to trigger your onboarding automation.
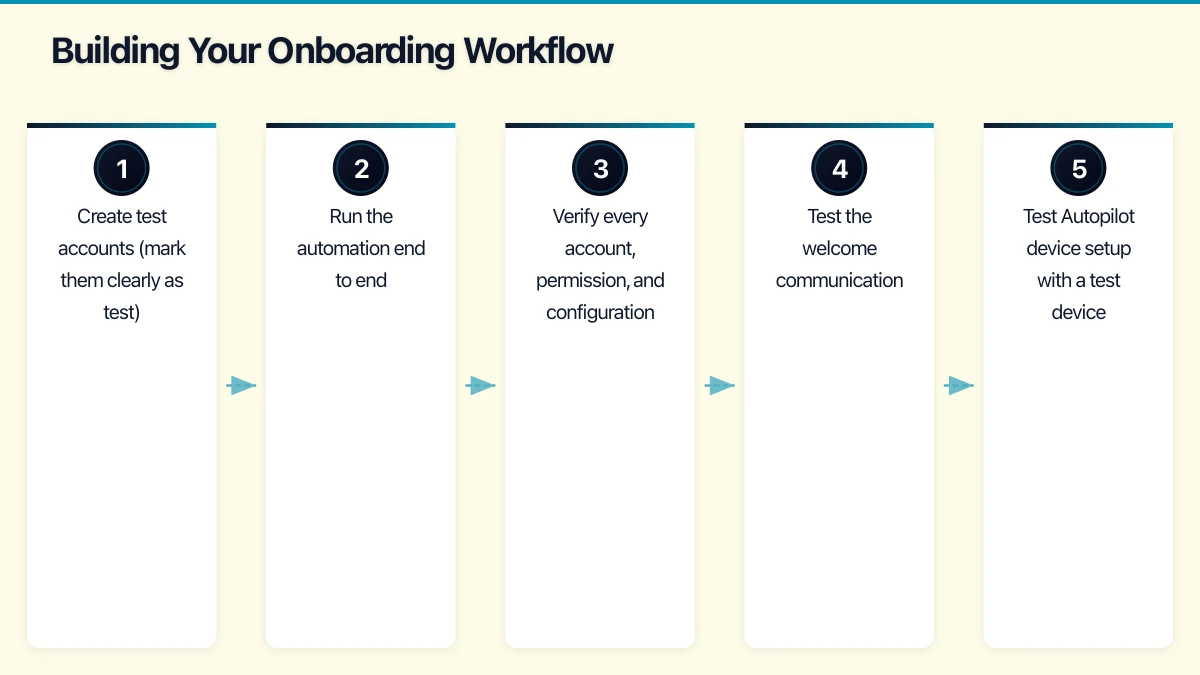
Step 5: Test Thoroughly
Before using automation for real new hires:
- Create test accounts (mark them clearly as test)
- Run the automation end to end
- Verify every account, permission, and configuration
- Test the welcome communication
- Test Autopilot device setup with a test device
- Document any manual steps that remain
Step 6: Build Offboarding Too
Onboarding automation is only half the story. Offboarding automation is equally important and often more security-critical.
Automated offboarding should:
- Disable the user account immediately
- Revoke all application access
- Convert the mailbox to a shared mailbox (for business continuity)
- Remove the user from all groups
- Trigger Intune device wipe (for company-owned devices) or app wipe (for BYOD)
- Notify the manager and IT team
- Create a task for device recovery
Measuring Success
Track these metrics to measure the effectiveness of your onboarding automation:
- Time to productivity: How long from start date until the new hire has full access to everything they need. Target: under 1 hour.
- IT time per new hire: How many minutes of IT staff time is needed per onboarding. Target: under 30 minutes (for tasks that cannot be automated, like physical device handover).
- Error rate: How often do new hires report missing access or incorrect permissions in their first week. Target: under 5%.
- New hire satisfaction: Ask new hires about their onboarding IT experience in their first-week check-in.
Onboarding automation is one of those investments that pays dividends every time you hire. Start with the basics, automate the most repetitive tasks first, and build from there. Your IT team, your HR team, and your new hires will all benefit.
If your team needs on-the-go access to cloud-managed systems, Awesome Apps builds practical mobile solutions for Australian businesses.
This article is brought to you by Ganda Tech Services — Sydney’s complete digital solutions provider covering cloud, web, and mobile.